Paw prints look incomplete in the Interactive Footprint Measurements screen in CatWalk XT
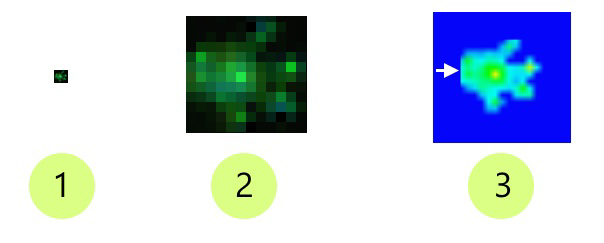
When the footprint is shown in the Interactive Footprint Measurements screen, it is enlarged by means of smoothing and anti-aliasing algorithms (See the arrow in image 3 below). Pixels that are outside the border of the footprint rectangle, which contain no data by definition, are “translated” to blue pixels.

This may result in effects like that in image 3, especially if the image resolution is low. To get more detail and reduce this effect, raise the camera closer to the walkway. Note that you will need to refocus the camera, define and calibrate the walkway, and redo the detection settings, so it's best to make this change at the beginning of a study.
If most of the prints are good, but a few are cropped or lack detail, you can skip the prints that are insufficiently clear. They will be ignored in the analysis if you have not taken any measurements for them.
In some cases it can be easier to see the print in actual color, rather than the false color image shown above in image 3. In the Interactive Footprint Measurements screen, right-click the Footprint image and select Switch to ‘Normal Color’ mode. You can switch back by right-clicking again and switch to False Color.