Check network settings for a Basler camera
Basler GigE cameras connect to the computer using a network cable, and as such must have network settings configured accordingly. If the camera is not detected, but is connected properly, check the network settings.
If you've checked these settings and the camera is not detected, also see Basler camera is not detected by EthoVision.
Camera Settings
As part of the drivers for the camera, Basler provides the Pylon IP Configurator to check and adjust the settings for the camera. Go to the Start menu and type “Pylon IP Configurator” and open the program. (The Pylon IP Configurator may also appear as an icon on the desktop, or you can find it on the Start menu under Basler.)
If it says your camera is “not reachable”, then there is an issue with the compatibility of your camera’s IP address with the network port’s IP address.
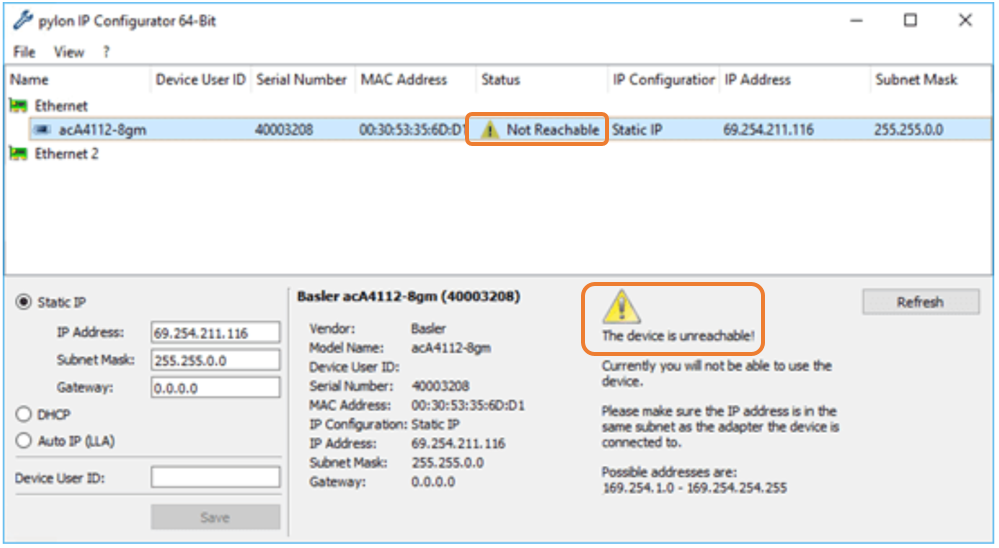
If you click on the camera that is “not reachable”, you can find the camera’s assigned IP address (and Subnet Mask) on the bottom left. The following IP addresses (and subnet masks) should be used:
Camera 1: 192.168.200.1 (255.255.255.0)
Camera 2: 192.168.201.1 (255.255.255.0)
Camera 3: 192.168.202.1 (255.255.255.0)
Camera 4: 192.168.203.1 (255.255.255.0)
NOTE The IP address for each camera is the same except for the third set of numbers underlined above. Also, make sure the Subnet Mask is 255.255.255.0 (not 255.255.0.0).
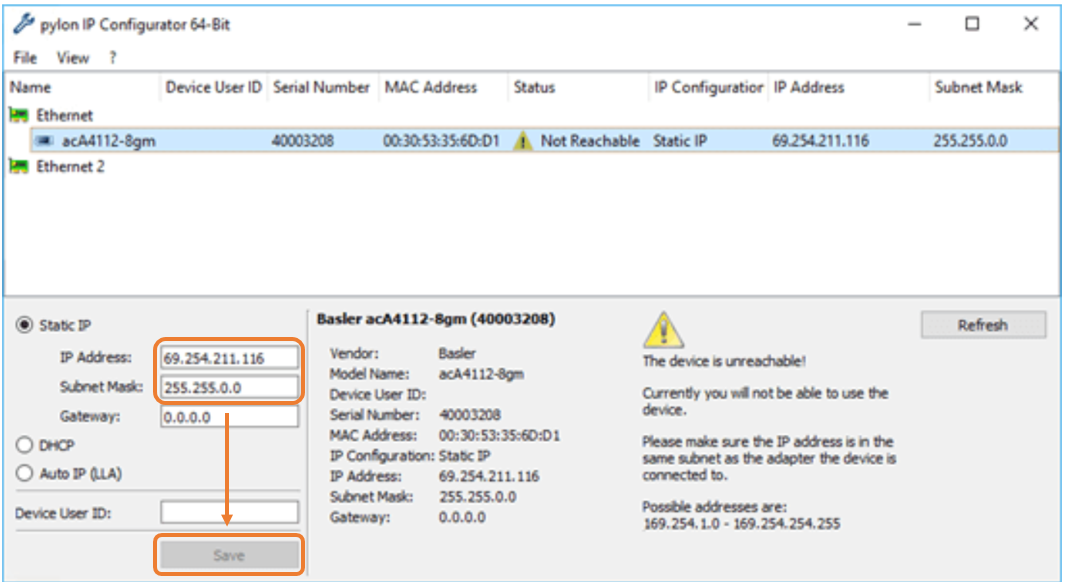
If you need to change a camera’s IP address and/or Subnet Mask (e.g., camera was not provided by Noldus), then do so in the Pylon IP Configurator and click “Save”.
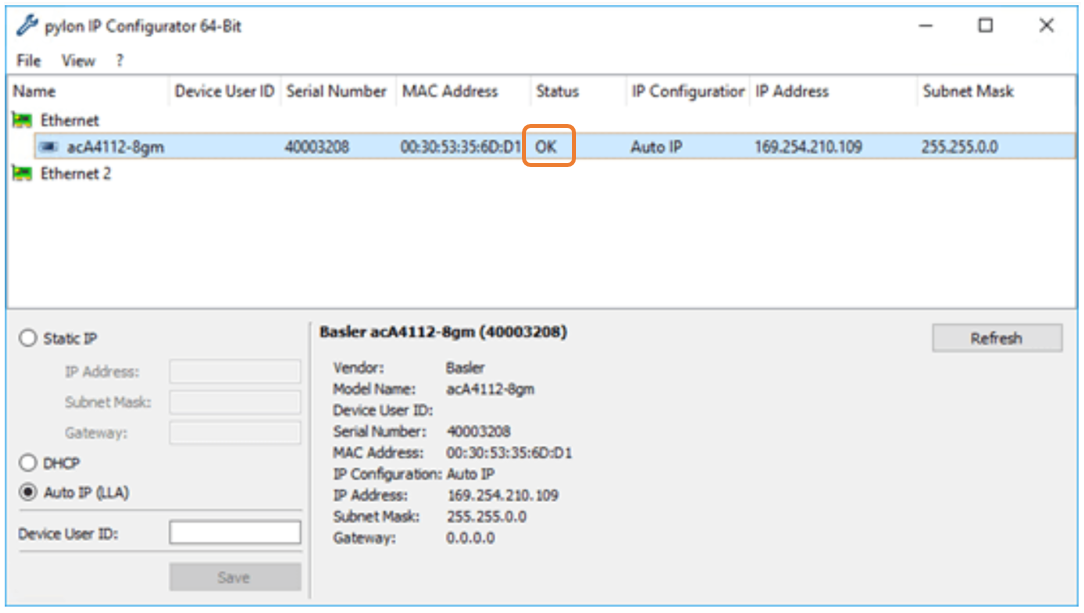
After changing and saving the IP address and Subnet Mask, the camera should report that it is “OK”. (Note: do not copy the settings shown in the image below, use Static IP and the IP addresses as listed in the text above.)
Network Adapter Settings
If the camera is still “not reachable”, then the network port that the camera is plugged into also needs to be changed.
To change the network port’s IP address:
a) Go to the Start menu and type “Control Panel”
b) Go to Network & Internet and then View network status and tasks.
c) Click Change adapter settings on the left side of your window.
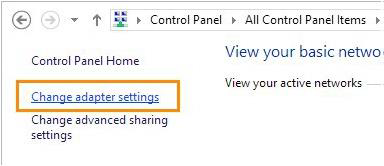
d) Right-click the Local Area Connection and click Properties. If your computer has more than one Local Area Connection, choose Noldus Camera Network #. Write down the number of this connection.
NOTE If your network card has 2 or 4 ports, you will need to assign an IP address to EACH port for EACH camera. You will see something like this on your PC (note you will NOT see “Noldus Camera Network” UNLESS you bought the PC from Noldus). Also, if you are unsure what port a camera is connected to, unplug the cable and watch for a red X to appear with the message "Network cable unplugged." When you plug it back in, that red X will go away.

e) Select Internet Protocol Version 4 (TCP/IPv4) and click Properties.
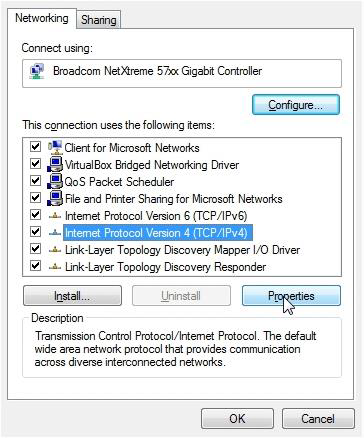
f) Select Use the following IP address and type in the IP address you will assign to this card/port.
Network port for Camera 1: 192.168.200.101 (255.255.255.0)
Network port for Camera 2: 192.168.201.101 (255.255.255.0)
Network port for Camera 3: 192.168.202.101 (255.255.255.0)
Network port for Camera 4: 192.168.203.101 (255.255.255.0)
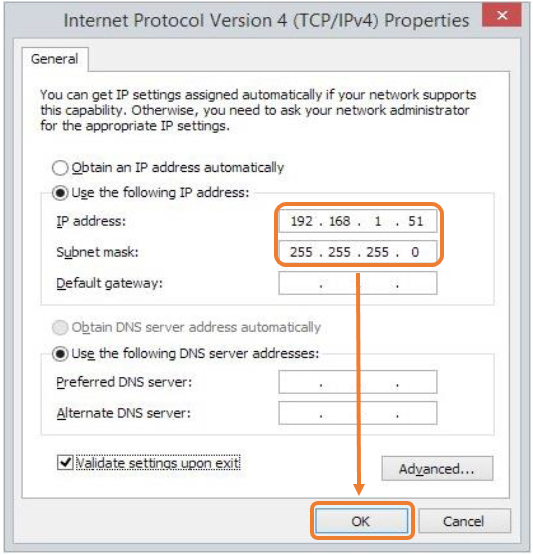
(Don't use the IP address shown in the picture, use the addresses listed above.)
When done, click OK and then Close.
You may need to restart the computer for all network issues to resolve.
NOTE The IP address for each camera’s network port is the same except for the third set of numbers underlined above. Also, the Subnet Mask of 255.255.255.0 should autofill once you click in that field. Lastly, note that the IP address assigned to the network adapter will match the first three numbers of the IP address of the camera, e.g. 192.168.200, but the last number will differ, .101 for the network adapter as shown here whereas it will be .1 for the camera.